Solar… Take Two?
After the success of converting my natural gas post lamp to solar a couple of months ago, I decided to find another application for solar lighting at home.
At my house, I have a pad at the end of the driveway. This makes it nice as a “turning point” for backing out of our side-load garage, but it also commonly becomes a parking spot for visitors. If you pull straight on to the pad and park your car, the drivers side of your vehicle will be quite dark when you get out because the positioning of your vehicle blocks most of the light coming from the coach lights on our garage.
Figuring out a way to add some light to the driver side of this pad seems to be a perfect opportunity for a solar fixture. One of the beauties of Solar lighting is that all you need is a purpose – installation is a breeze – there are no wiring considerations to be made, no contractors to be called, all you need is a little DIY spirit and a product that “fits the bill” and you’re good to go.
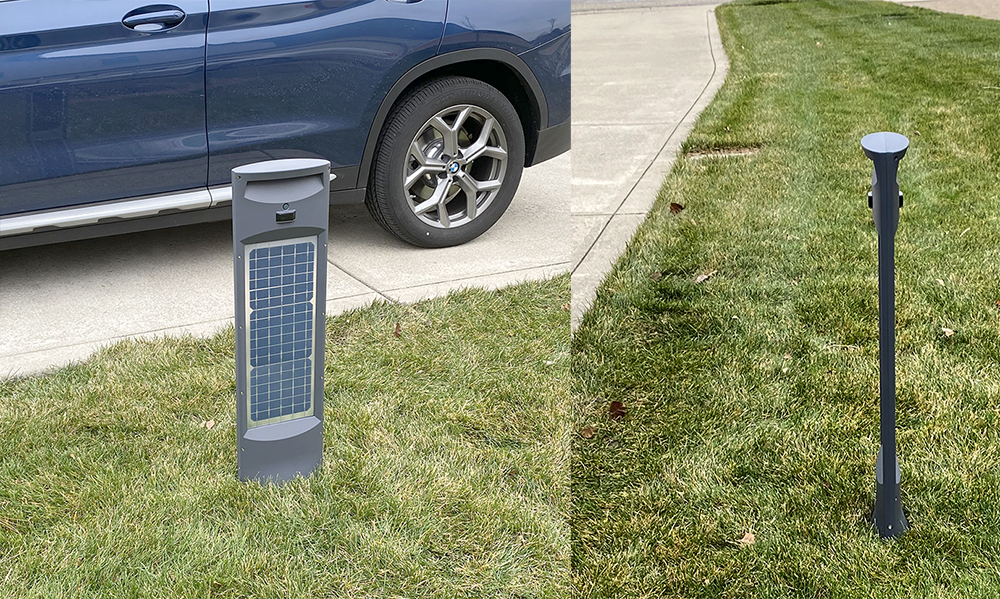
In my own experience thus far, Gama Sonic’s products have proven to provide reliable dusk to dawn lighting in most conditions and they have a large range of products to fit many styles and applications. After some research, it seems that Gama Sonic has a solar bollard light (pictured below) called the GS-9i that would be perfect for adding a little bit of courtesy light to this pad on the driveway.
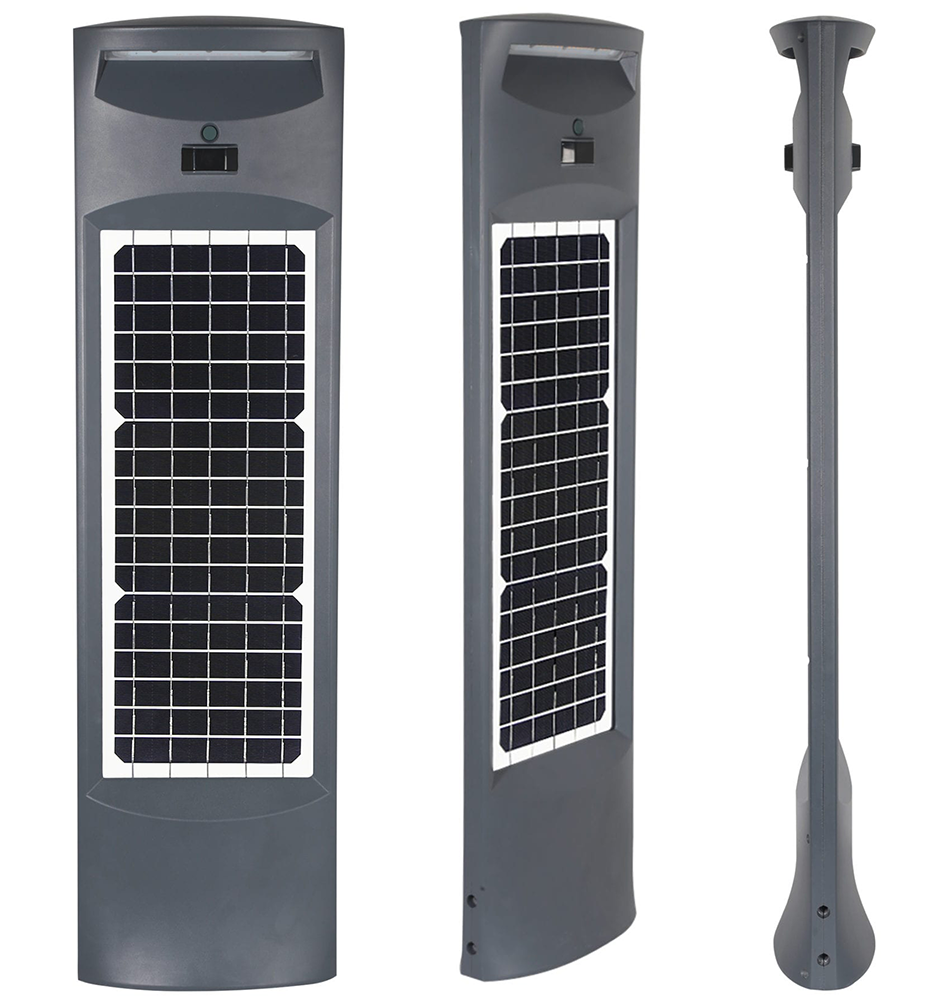
This bollard style light is a tall and thin column (Approx 31.25″ tall, 8.75″ wide and 3.5″ deep) with a pretty neat design. It’s intended for commercial installation (think illuminating walking paths, parking areas, etc) – but it seems to me that it would be just as well suited for the type of application I was considering at home – so after another quick conversation with Matt Cohen at Gama Sonic – one was on it’s way to my door.
The unboxing…
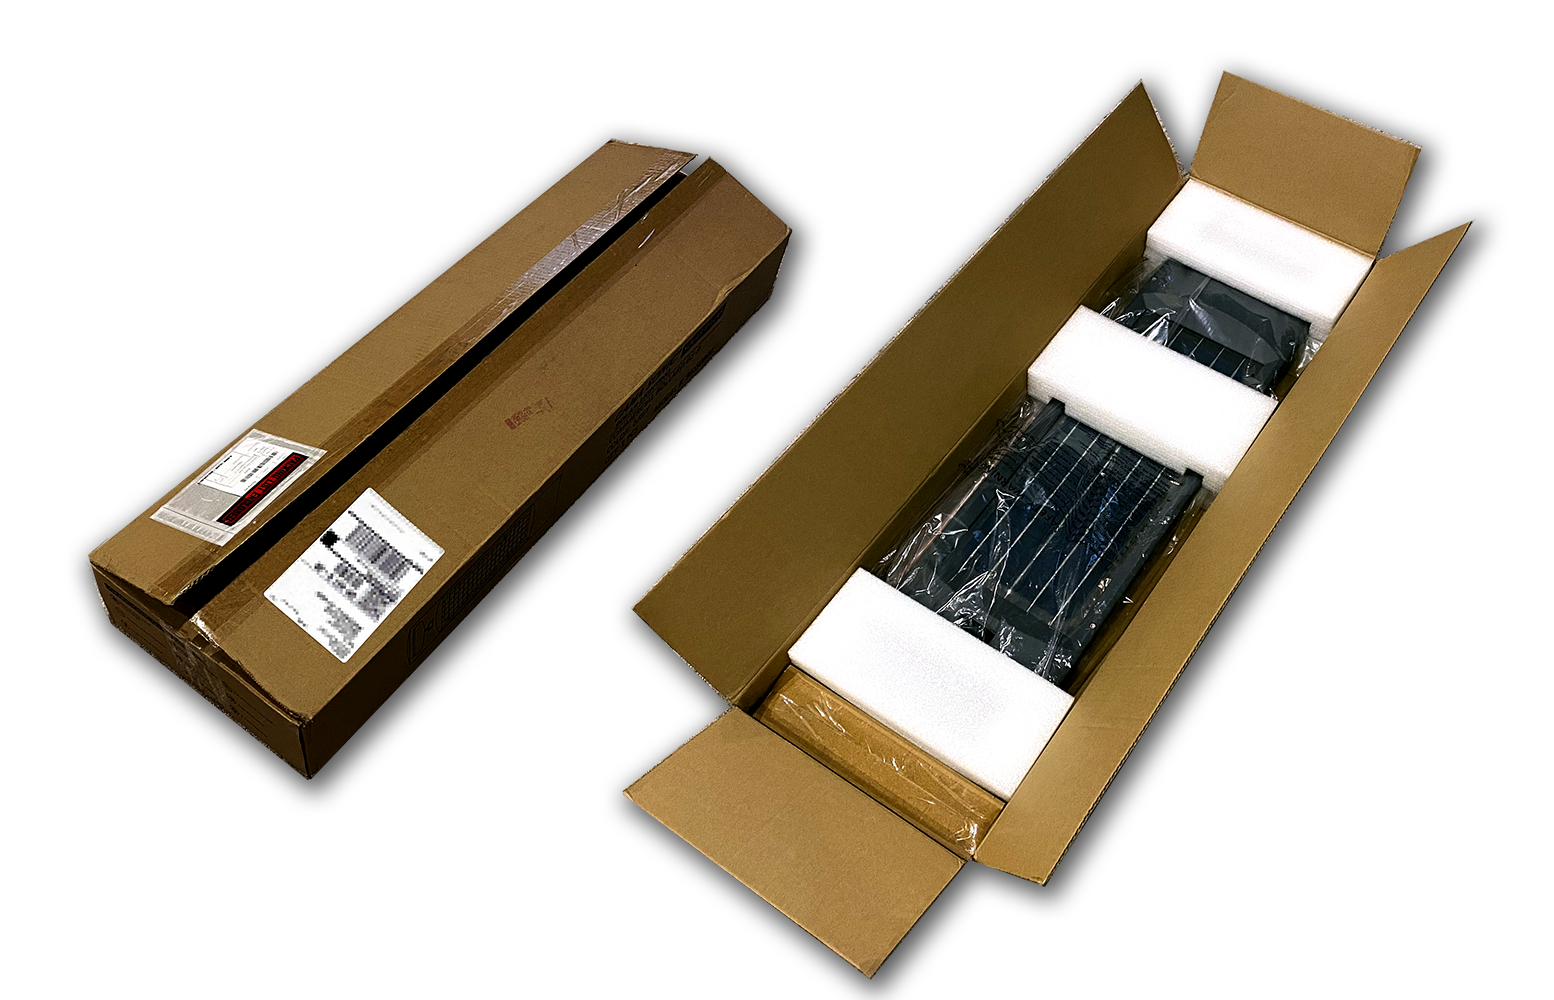
Much like last time, the bollard arrived via UPS. It came in a long, thin sturdy package with plenty of well designed styrofoam packing material to keep it safe on the way to me.
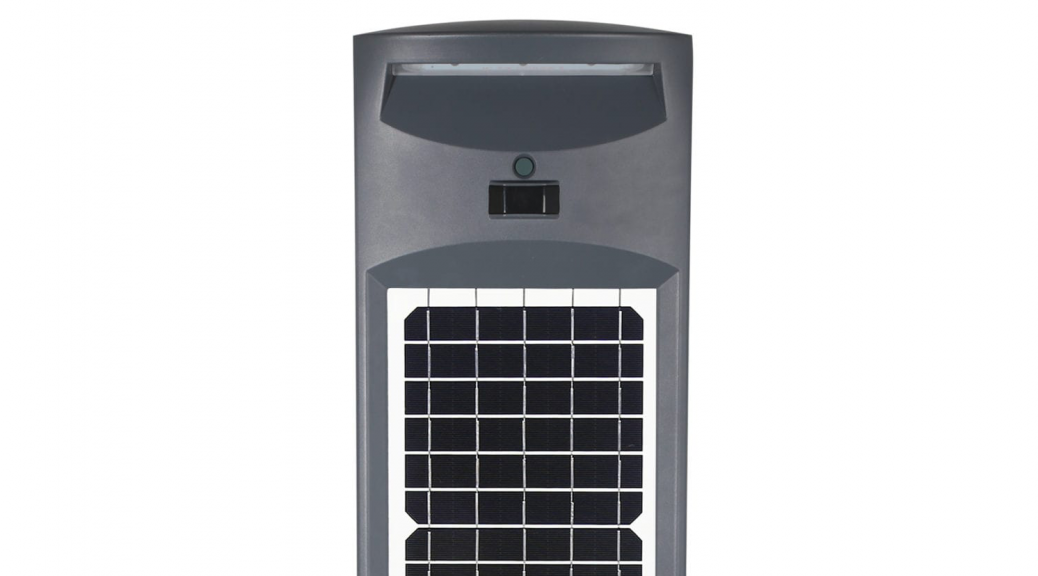
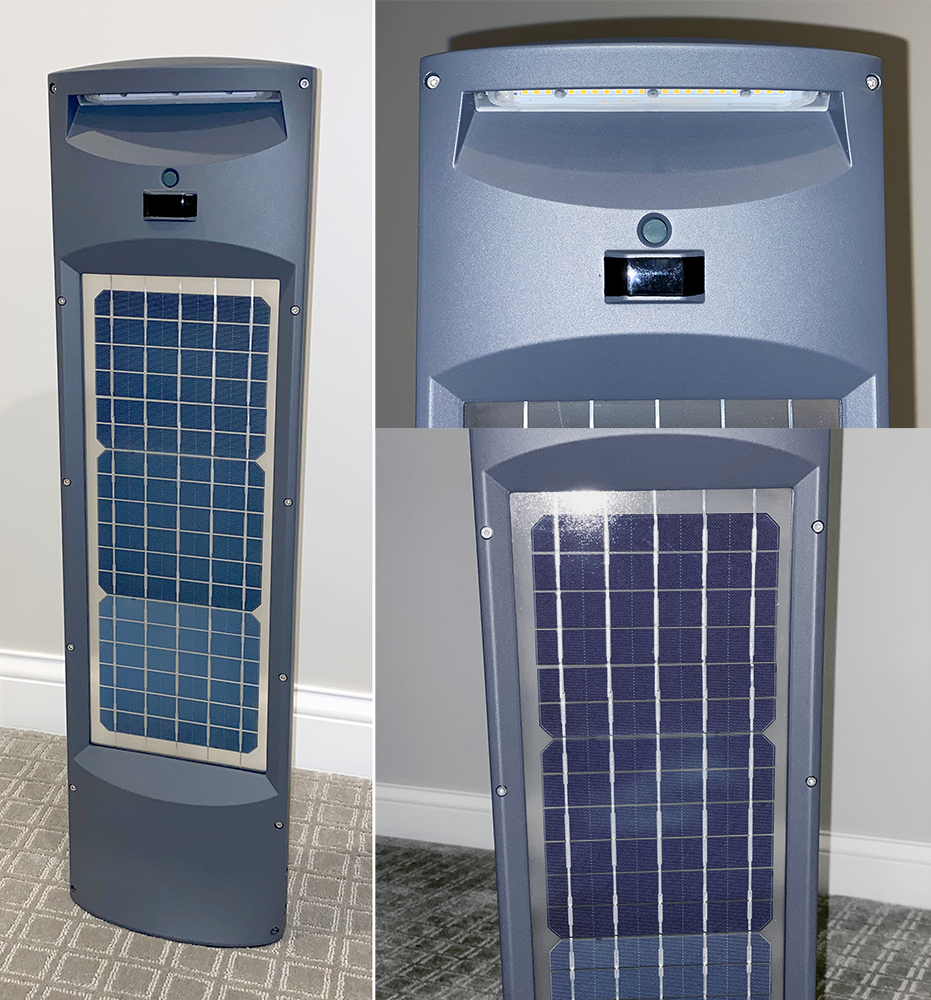
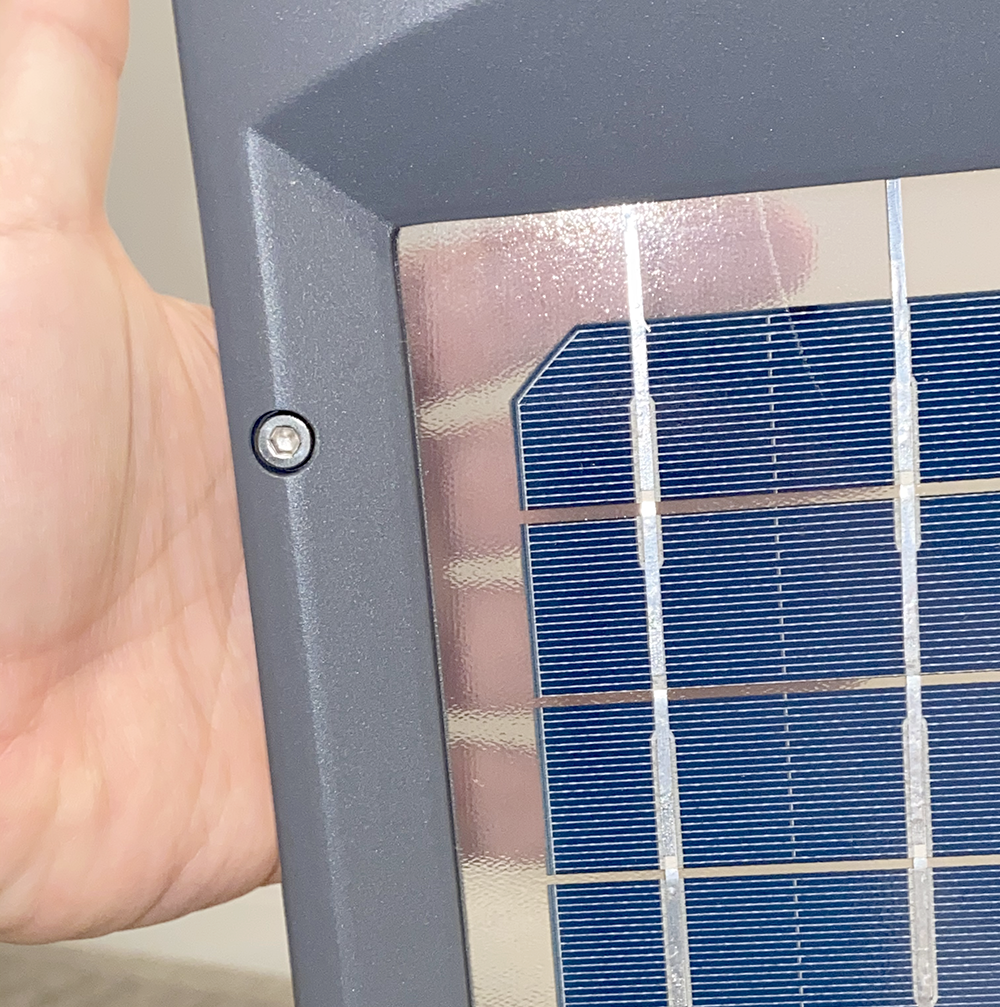
I removed the bollard from the packaging and was impressed by the build quality and some of the more subtle design features. The main body of the enclosure is cast aluminum with a powder coated charcoal grey finish (at the time of this writing, this is the only color option available). There is a thin strip of powerful SMD LEDs, an optics window, and a small power button near the top on either “face” of the unit.
The solar cells are in what Gama Sonic calls a “bi-facial” arrangement. Obviously, this means that there are monocrystalline solar panels on either side (or face) of the unit. The panels themselves are enclosed in tempered glass (another build quality bonus) which makes them easy to clean and adds to the durability and longevity of the product. What isn’t obvious in the marketing materials or pictures on their website, however, is that the solar panels appear to “float” in the middle of the glass structure – which is a neat design detail that looks quite cool in person.
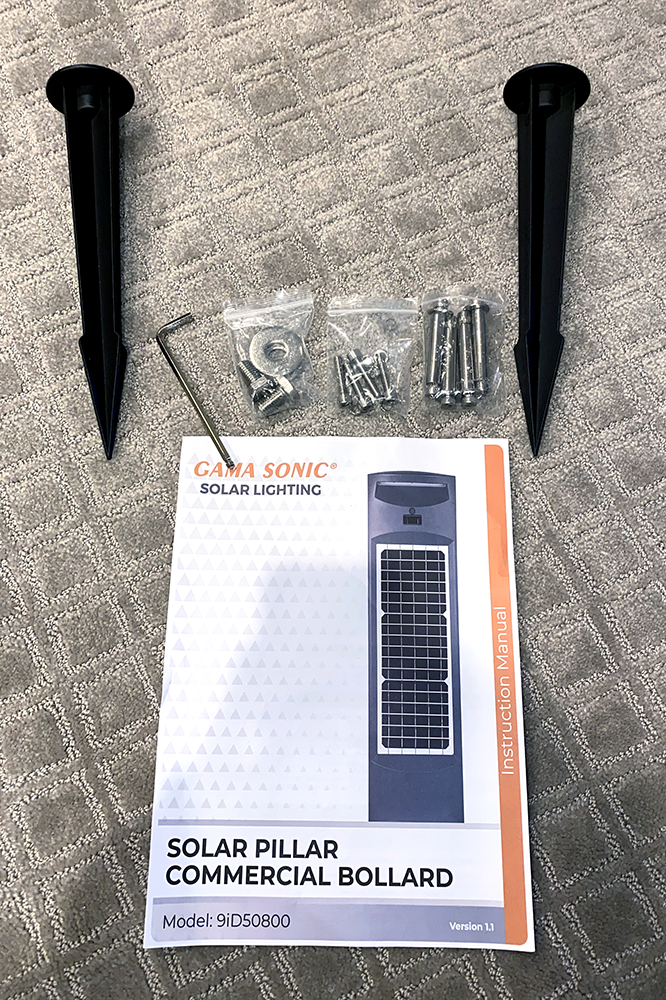
The package also includes instructions and a mounting plate that can be used for mounting the bollard on either turf or concrete surfaces. For installing into concrete, four concrete anchors are included in the package. I will be installing this into turf – and the package includes two long metal spikes and two large bolts and washers that can be used to fasten the spikes to the plate. Finally, there are four stainless steel allen bolts with washers and lock washers that are used to secure the bollard to the mounting plate and an allen wrench.
On the bottom of the bollard, there are eight screws that secure the battery compartment. Inside the battery compartment is a user replaceable 6.4V 6,000 mAh LiFePO4 battery pack. The pack is said to provide up to 48 hours of dusk-to-dawn operation even if it’s overcast and the solar cells are not able to recharge the battery.
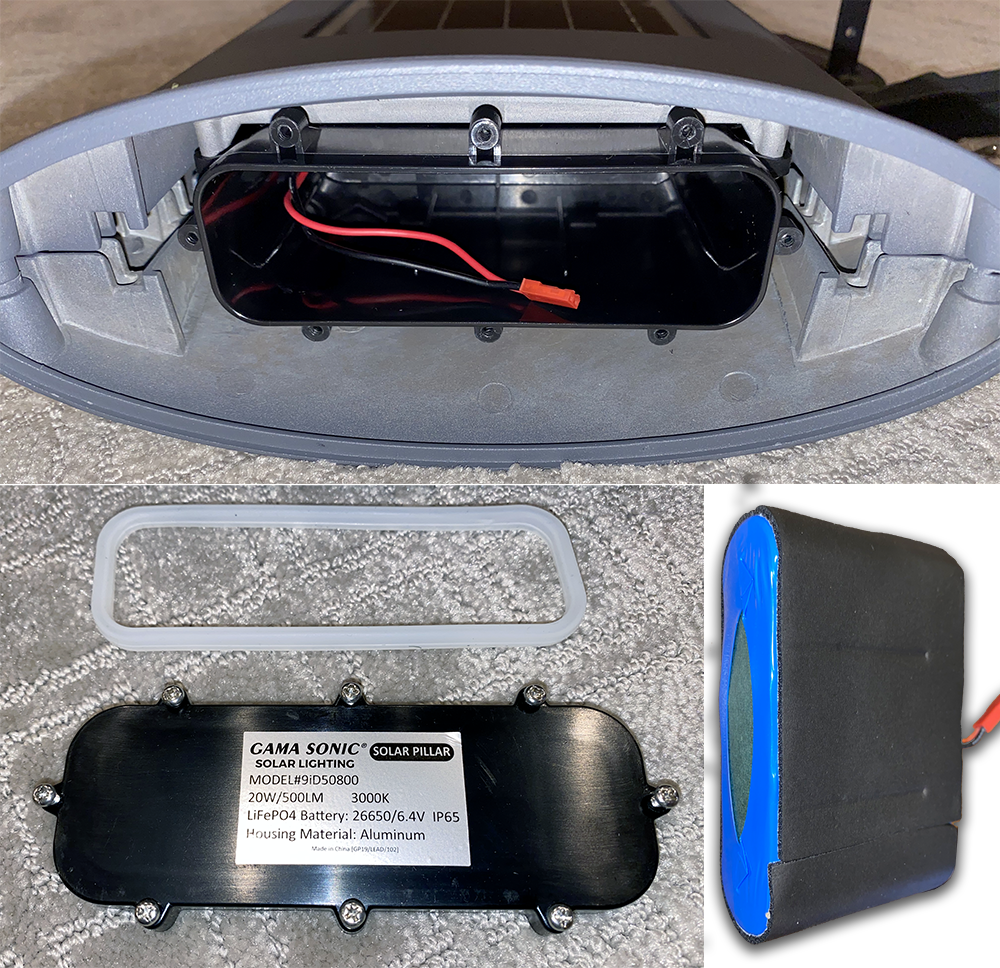
The battery compartment also has a rubber gasket to keep out the elements and the entire product is given an IP65 rating for weather resistance. This means this bollard is perfectly happy sitting in the elements and will provide reliable performance regardless of what mother nature throws at it.
Installation…
Looking at the manual, installation seems quite simple. If you’re installing on concrete, you simply locate the base where you want it to be and then mark and drill four 3/8″ wide x 3″ deep holes into the concrete. You then use the provided anchors to secure it into position. If you wanted to install on to a deck or a wooden surface, you could easily substitute four wood screws and a couple of washers rather than the concrete anchors – but this would be a true DIY install – such anchors are not included with the product.
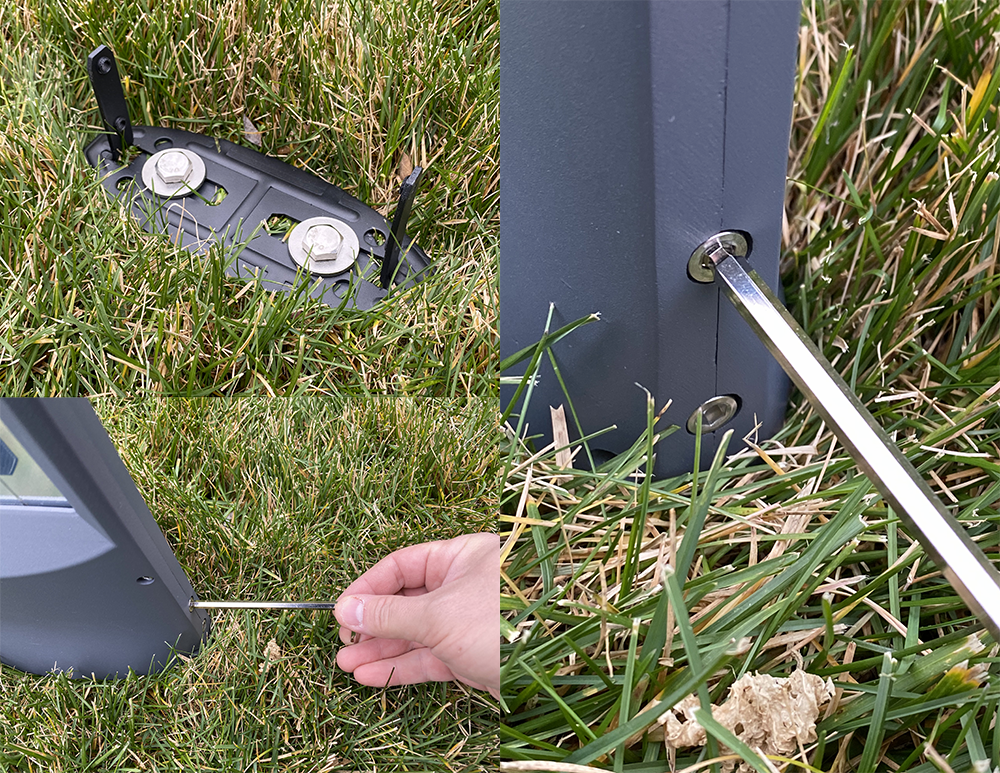
For a turf install, like mine, you simply pound the two included spikes into the ground anywhere from 2.5″ to 4″ apart (center to center) and then secure the base to the spikes using the included bolts and washers. You’ll want to try to pay attention to how level the base is as you position and pound the spikes, however — if you are even marginally “off-level” it will be quite visible when the tall, thin tower is mounted on to the base.
For my install, I chose to pre-assemble the spikes to the base and push the spikes into the ground by hand as far as possible while checking my progress with a level. Once I could no longer push the spikes by hand, I used a hard rubber mallet to continue the process, constantly checking and adjusting level as necessary.
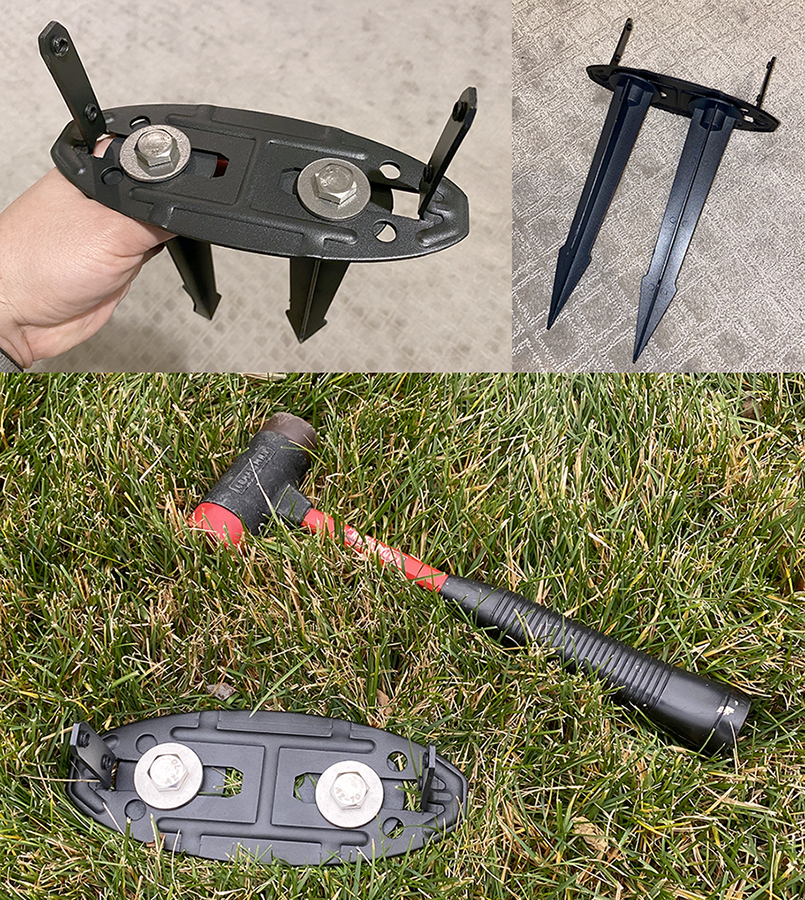
Bottom – The base after securely mounted into the ground – at first by hand, and then finished off by carefully alternating between a few blows from a rubber mallet and then level adjustment, repeated until the base was firmly down to ground level.
Once you have the base in place, you simply slide the bollard down onto the two fingers that are sticking upward and then secure it with the four provided allen bolts along with a combination of a standard washer and a lock-ring washer.
The Finished Product…
Once installed, the only thing you have to do is set the operating mode and wait for darkness to fall. Each side of the bollard is independently configured by the power button on each side. The first press of the button configures that side to operate in high brightness mode, and success is confirmed by a single blink of the LEDs on that side. The second press configures that side to operate in low power mode, and success is confirmed by two blinks of the LEDs on that side. The third press turns that side off.
If you are operating the lights on both sides of the unit, high power mode is 250 lumens per side. After 4 hours, the lamp will dim to 120 lumens per side to conserve battery. Any time motion is detected, it will bump back up to the full 250 lumen per side brightness for 30 seconds and then will re-dim itself. If you are only operating one side on high, you will enjoy 500 lumens of brightness and the light will dim to 250 lumens after four hours, and motion detection will spring the light back up to 500 lumens for 30 seconds.
If you are operating the lights on both sides of the unit, low power mode is 125 lumens per side. After 4 hours, the lamp will dim to 60 lumens per side to conserve battery. Any time motion is detected, it will bump back to the full 125 lumen per side brightness for 30 seconds and then will re-dim itself. If you are only operating one side on low, you will have 250 lumens of brightness and the light will dim to 120 after four hours and then motion detection would spring it back to 250 lumens for 30 seconds.
The Verdict…
This is a nicely designed unit that is easy to install and operate. The 6,000 mAh battery pack should provide days of dusk to dawn operation when it’s overcast, which is welcome when dealing with solar powered lighting. The brightness specifications are fantastic for battery/solar powered lighting and I really like that you can choose to run in either high or low power mode, and you can independently control the sides of the lamp. I will likely run this light at all times in LOW mode, due to the application here – however, for path lighting I would probably recommend that you run it in LOW mode in the winter (when overcast days are more common and lithium battery performance can sometimes struggle with cold temperatures) and HIGH in the summer months.
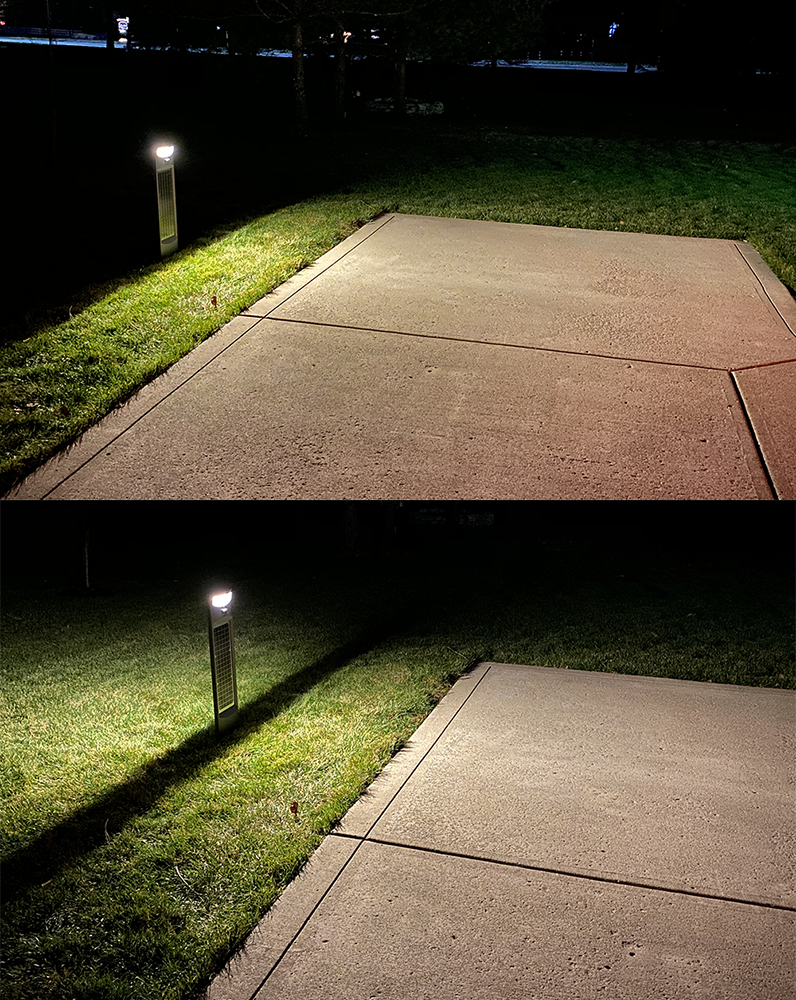
Bottom: The light on HIGH setting on both sides.
As with my last solar light install, I have been impressed with Gama Sonic’s products and service. I’d recommend that anyone seriously considering a performant solar lighting solution check them out. Their product line is growing and so far my experience with them has been excellent.
Contact…
As I mentioned above, and in my previous article, Matt Cohen with Gama Sonic has been a great resource when researching and implementing my solar projects. Not only is he friendly and knowledgeable, he has offered to similarly help any of you in finding and buying the right lights for your desired applications at a discount over traditional big box retail pricing. If you are contemplating purchasing solar lighting solutions, I would recommend reaching out to him directly at matt@gamasonic.com or by phone 727-688-5030.